

 http://www.planetary.org/blogs/guest-blogs/2017/0125-go-stand-on-mars.html
Category Archives: Tips
Space Engine: Realistic Visualization
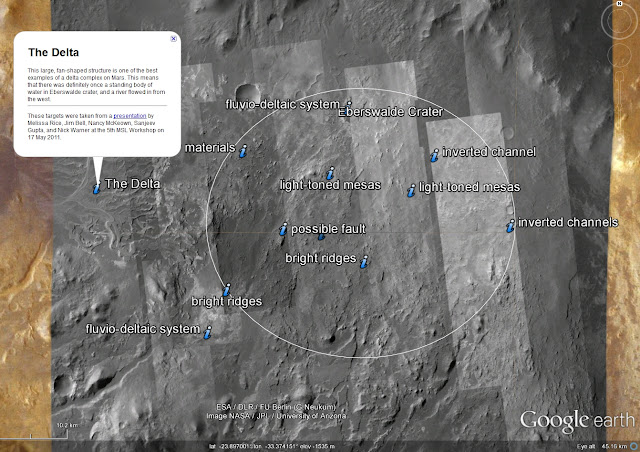
Google.com/Mars
Mother Mars! "A Living Mars: A Visualization of Mars, Very Much Alive" Thanks to Kevin Gill
“A visualization of an Earth-like Mars, be it ancient or a future of terraforming. This was
produced by rendering a flat model image using the MRO MOLA 128 pix/deg elevation dataset
in jDem846 then layering imagery from Blue Marble in GIMP. The layer was then brought back
into jDem to produce the final spherical projection and scripted to add the atmosphere and
clouds from the NASA Visible Earth catalog. Eye position is about 6,600 kilometers (4100 miles)
from the surface of the planet and looking at the southern hemisphere (~20° South) and the
180th meridian.”
Thanks Kevin Gill!!
http://www.flickr.com/photos/kevinmgill/8165909516/
Screenshot of jDem846
“The height of the clouds and atmosphere are largely arbitrary and set for the sake of
appearance. The terrain is also exaggerated by about 10 times. The orbital “eye” view is about
10,000 km (~6,200 miles) from the surface.
appearance. The terrain is also exaggerated by about 10 times. The orbital “eye” view is about
10,000 km (~6,200 miles) from the surface.
A two dimensional digital elevation model was first rendered in jDem846 (an open-source
learning project of mine) using the MRO MOLA 128 pix/deg elevation dataset. In that model, I
picked a sea level and scripted it such that terrain at or below that level was flat and blue.
learning project of mine) using the MRO MOLA 128 pix/deg elevation dataset. In that model, I
picked a sea level and scripted it such that terrain at or below that level was flat and blue.
The resulting model was then brought into GIMP were I painted in land features using a NASA
Blue Marble Next Generation image for the source textures. There is no scientific reasoning
behind how I painted it; I tried to envision how the land would appear given certain features or
the effects of likely atmospheric climate. For example, I didn’t see much green taking hold within
the area of Olympus Mons and the surrounding volcanoes, both due to the volcanic activity and
the proximity to the equator (thus a more tropical climate). For these desert-like areas I mostly
used textures taken from the Sahara in Africa and some of Australia. Likewise, as the terrain
gets higher or lower in latitude I added darker flora along with tundra and glacial ice. These
northern and southern areas textures are largely taken from around northern Russia. Tropical
and subtropical greens were based on the rainforests of South America and Africa.
Finally, that image was brought back into jDem846 as a layer to be reapplied to the same MOLA
dataset, but rendered as a spherical projection (like Google Earth). I scripted the model to apply
a three-dimensional cloud layer, add an atmosphere, and dampen specular lighting on dry land
and under clouds. There are some other scripted tweaks here and there.”
dataset, but rendered as a spherical projection (like Google Earth). I scripted the model to apply
a three-dimensional cloud layer, add an atmosphere, and dampen specular lighting on dry land
and under clouds. There are some other scripted tweaks here and there.”
Free 3D Model Libraries of NASA Spacecraft, etc.
Free ISS Model from NASA
(Use the free Blender program to translate files to your preferred modeling application.)
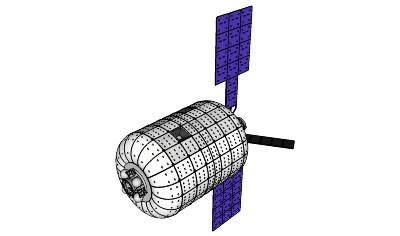
Free Bigelow Hab model
(The .skp file can be exported as .obj from SketchUp Pro’s free demo.)
_________
Free & Commercial from TurboSquid:
Ira Glass on Beginning Artists
Schoolism Interview with Concept Designer Scott Robertson
“If you give someone the perspective tools to communicate – with perspective drawing and showing form and indicating material – that means that they can share with anybody in the world what has never existed before. And then on the other side, if you teach them how to think creatively, invent things that nobody’s ever seen before – now you’ve taught the creativity plus you’ve empowered them with the visual communication tools to show their ideas.”
Tech Tip: Wacom Settings for Storyboarding in Photoshop
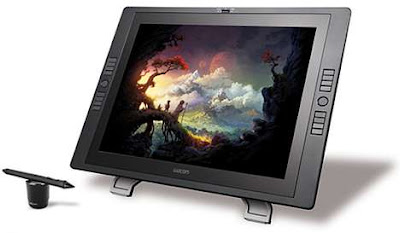
Keep in mind Feng Zhu and Dylan Cole, among many digital artists, prefer a $200 Wacom tablet to a $2,500 Cintiq. At first this may be hard to believe — then for students and artists in developing countries, revolutionary. At the start of their studies most digital artists think: “Shesh this tablet sucks! Please I need a Cintiq!” Once comfortable with Cintiq workflows later in their careers they tend to remain conditioned to tolerate Wacom’s massive eighty-five pound twenty-five hundred dollar desk anchor. Don’t. There is no need to buy a Cintiq — it won’t help. Practice, pay off your credit cards, and travel — with a laptop and tablet.
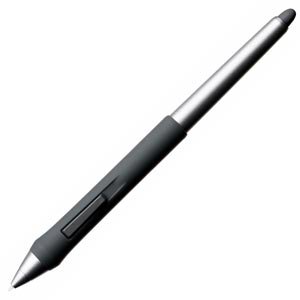
Set the end of the toggle switch closest to the pen’s tip to trigger Photoshop’s “step backward function” Command+Option+Z This is the function you will use most often.
Set top of the toggle switch (in the direction of the ‘eraser’) to trigger the “Option” key. This allows easy sampling of colors from your image when using the Brush Tool by activating the Eyedropper.
Finally program a touch strip to step between brush sizes (on the left side of the tablet if you hold the pen in your right hand)…one direction of the strip should be set to “[” the other to “]” (left and right hard brackets). By sliding your finger across this touch strip you can adjust brush, eraser, and many other tool sizes on the fly.
Add shadows on separate layers with a dark ‘soft’ brush (0% hardness) set to opacity of 20%…adding more shadow with each stroke.
That’s basically it. Be sure to work in layers and Smart Objects (lines, shadows, highlights, etc on different layers; finished characters and references in Smart Objects)…use the lasso tool and jump selction function ( J+Shift+Command) to cut distinct elements into their own separate layers.
It is very rare that you would ever need any other brush than the standard default hard brush with “template pen pressure” – the brush Feng used for most of his career. Other settings and exotic brushes will waste your time. Most concept artists draw with standard photoshop brushes. Feng Zhu for example spent years using only the default hard round brush — now his favorite is the default chalk brush with opacity turned off. Nothing fancy. If you want a special effect, draw it. ; )
Try to work in 16:9 ratio canvas dimensions to condition your composition skills. For storyboarding these settings will keep file size manageable: 960×540 px, 72 dpi, 8 bit greyscale. If you have questions, ask ; )
The best general concept art tutorials are free by Feng Zhu: http://www.youtube.com/user/FZDSCHOOL
"Exercise or Not, Sitting at a Desk All Day is Bad for You"
“It doesn’t matter if you go running every morning, or you’re a regular at the gym. If you spend most of the rest of the day sitting – in your car, your office chair, on your sofa at home – you are putting yourself at increased risk of obesity, diabetes, heart disease, a variety of cancers and an early death. In other words, irrespective of whether you exercise vigorously, sitting for long periods is bad for you.” http://lifehacker.com/5482856/exercise-or-not-sitting-at-a-desk-all-day-is-bad-for-you
$20 Cintiq Solution (standing allows an ecstatic jig once in a while too)
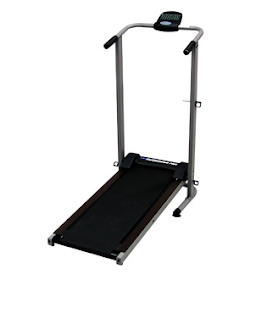
Update: slip a manual treadmill beneath the stand (such as this $120 version);
throw away its vertical supports…set it on a lower wooded frame and
you’re walking while drawing!! The best ever!!).
Update: an $800 electric powered seated/standing adjustable desk…for which I cannot envision spending $800, ever.
Update: “Inactivity boosts cancer risk, research finds,” Washington Post: “…among post-menopausal women, taking frequent breaks from sitting was associated with smaller waist circumference and lower risk of some cancers. Even short periods of light activity — frequently standing up and walking for as little as a minute at time — reduced risk for such biomarkers as large waist circumference, elevated triglyceride levels and increased insulin resistance, which are linked to heightened cardiovascular disease but might also boost cancer risk.”
“Stand Up While You Read This!” http://opinionator.blogs.nytimes.com/2010/02/23/stand-up-while-you-read-this/
Feng Zhu School of Design: Inspiration for Concept Artists
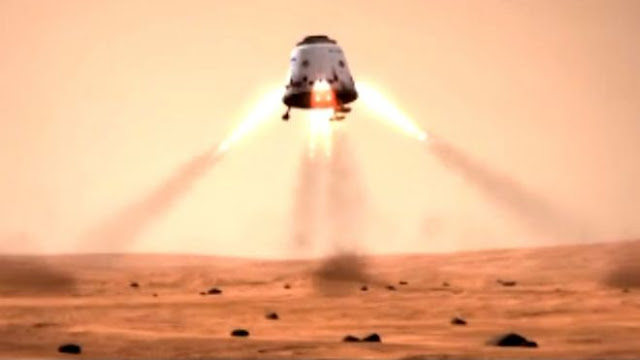
Concept designs depicting Lockheed Martin’s Orion and SpaceX’s ‘Red Dragon’.
(If artists responsible for rendering these images would please contact us we would love to feature posts dedicated to your work: [email protected] )

A fantastic resource from which even professionals can glean tips is the YouTube channel to which concept designer Feng Zhu generously posts many tutorials:
Just please no depictions of guns, monsters, or shiny Battlestar Gallactica vehicles…
Check out our “Guide to Mars Positive Art“


